Our support team is available 24/7 — we are always here to help with hosting and server issues.•We are now accepting requests for dedicated server rental and colocation services in our data center.•Reminder: we recommend enabling backups for additional data protection.•A new VPS/VDS lineup with NVMe storage and improved performance is now available.•Maintenance work on some servers has been completed. All services are operating normally.•
Our support team is available 24/7 — we are always here to help with hosting and server issues.•We are now accepting requests for dedicated server rental and colocation services in our data center.•Reminder: we recommend enabling backups for additional data protection.•A new VPS/VDS lineup with NVMe storage and improved performance is now available.•Maintenance work on some servers has been completed. All services are operating normally.•
Аккаунт в General iT
Вход / Регистрация
Войдите или создайте аккаунт для управления услугами в панели.
The Hints module enables the display of interactive hints across all website pages. It demonstrates interface capabilities with automatic focus on elements and provides explanations for using specific tools.
Hints are implemented as dialog windows containing a title, description, and control buttons.
The Hints module enables the display of interactive hints across all website pages. It demonstrates interface capabilities with automatic focus on elements and provides explanations for using specific tools.
Hints are implemented as dialog windows containing a title, description, and control buttons. They are attached to specific elements within the site's DOM tree, and each hint must have a unique selector.
Two types of hints are supported: single and group (step-by-step). Single hints appear once. Group scenarios display a sequence of hints on a single page, focusing sequentially on different areas. Step-by-step hints differ from single ones by including navigation buttons.
Creating and editing hints is restricted to users in the 'Hint Editor' group or portal administrators. The method for opening the creation dialog depends on the site license: for 'Business' and 'Bitrix Online Store' editions, a button in the interface is used.
To use auto-suggestions in Bitrix24, open the user personal menu by clicking the button with your initials, then select the required option from the displayed menu.
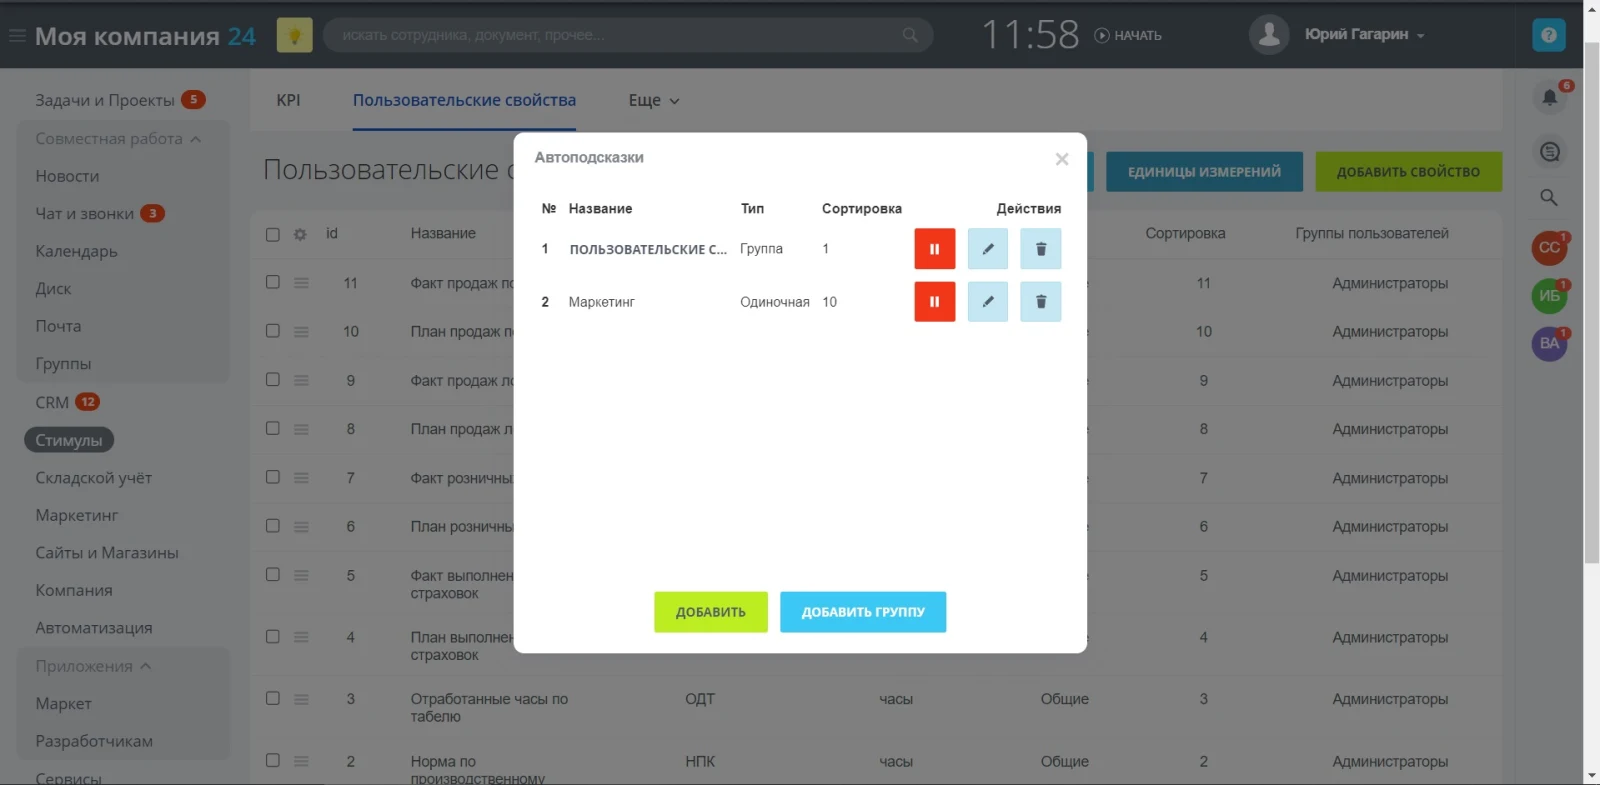
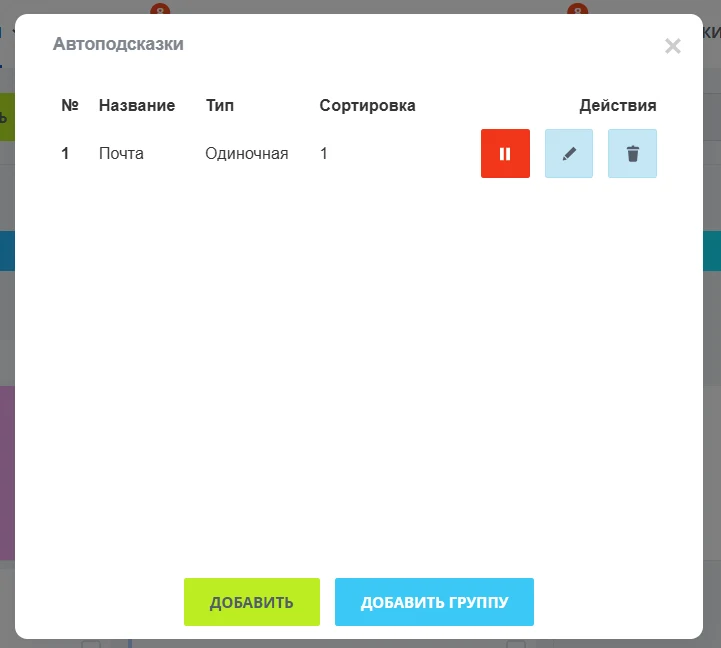
Performing the specified actions will open the "Auto-Hints" dialog box, as shown in Figure 1.
Fig. 1. Example of the 'Auto-hints' dialog window display.
Creating a single auto-hint
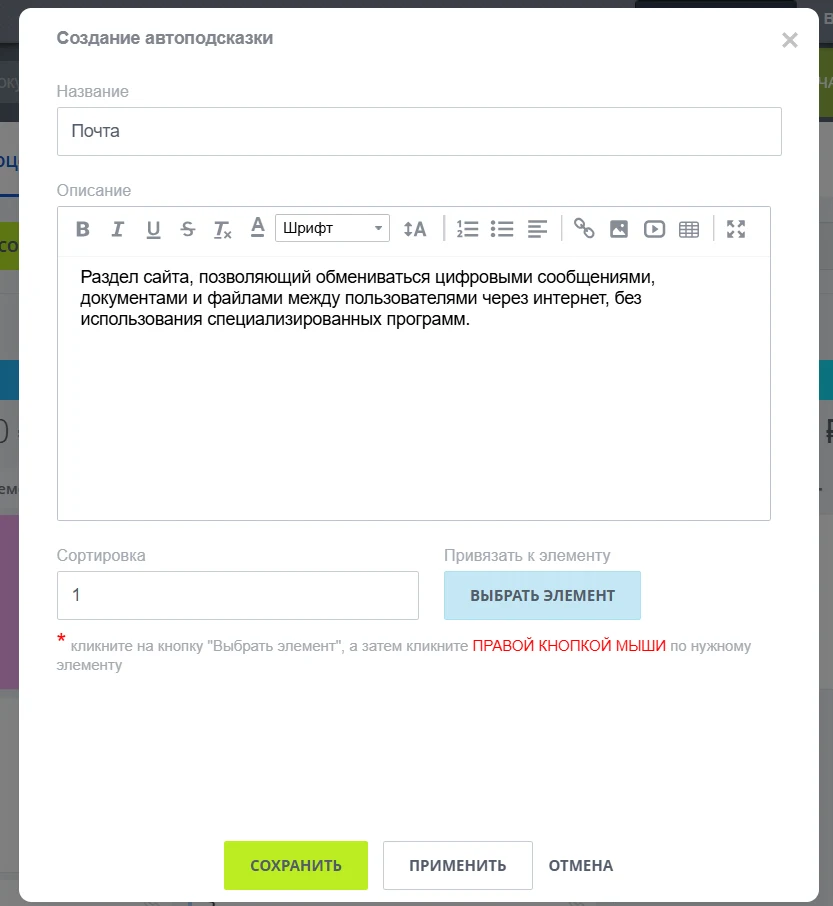
To create a single auto-hint, click the 'Add' button (see Fig. 1). The 'Create auto-hint' dialog window will open, as shown in the figure below.
Fig. 2. Example of the 'Create Auto-Hint' dialog window.
Enter the auto-hint name in the 'Name' field and add the description text in the 'Description' field.
Specify the sort order number. Auto-hints with a lower number are displayed earlier. If sort order numbers are identical, the hint with the lower ID takes priority.
Binding an auto-hint to a page element can be done in two ways:
1. Click the 'Select Element' button to open the page for choosing the target element.
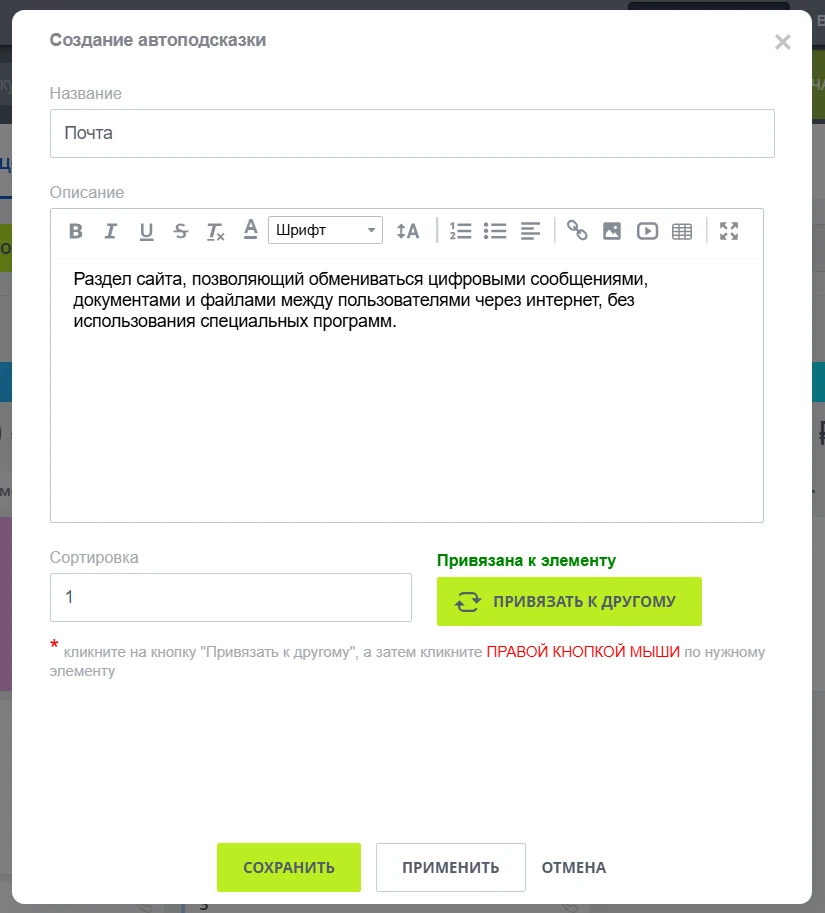
2. Right-click the target element. The 'Create Auto-Hint' dialog will open, confirming that the element has been bound.
Click the Apply button if you need to edit the autohint field values, or click Save to save the autohint and return to the Autohints dialog. After these actions, a record for the newly created autohint will appear in the list.
Fig. 4. Example of the 'Auto-hints' dialog window displaying a record of a created hint.
Creating a step-by-step auto-hint
General information
A step-by-step auto-hint is a group of related hints. Forming such a group involves two stages: creating the group itself and adding individual auto-hint records to it.
Creating an auto-hint group
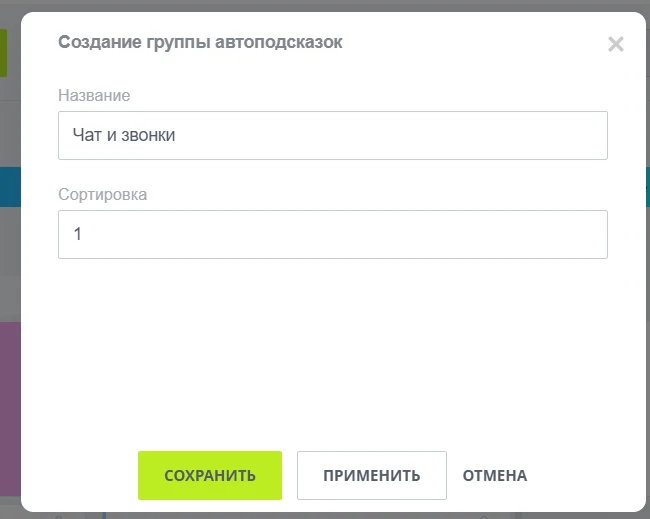
To create a group, open the 'Auto-hints' dialog window and click the 'Add group' button. The 'Create group' dialog window will then appear.
Fig. 5. Dialog window for creating an auto-suggestion group
Enter the group name in the "Name" field.
Specify the sort order number in the "Sort" field. Auto-suggestions with a lower sort order number appear first. If sort order numbers are equal, the group with the lower identifier takes precedence.
Click "Apply" to edit group field values, or click "Save" to store the group information and return to the auto-suggestions dialog.
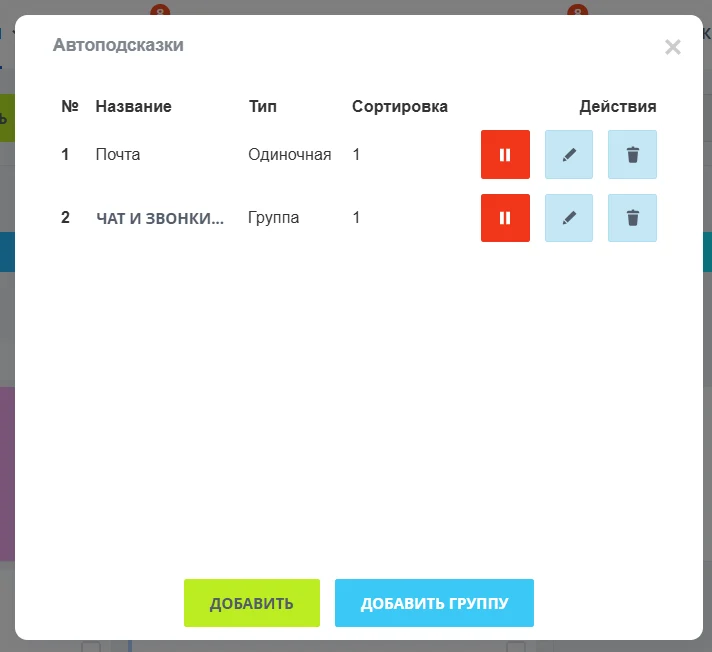
After these actions, the newly created group appears in the list of auto-suggestion groups.
Fig. 6. Example of the 'Auto-hints' dialog window displaying a record of a created auto-hint group.
Creating an auto-hint group
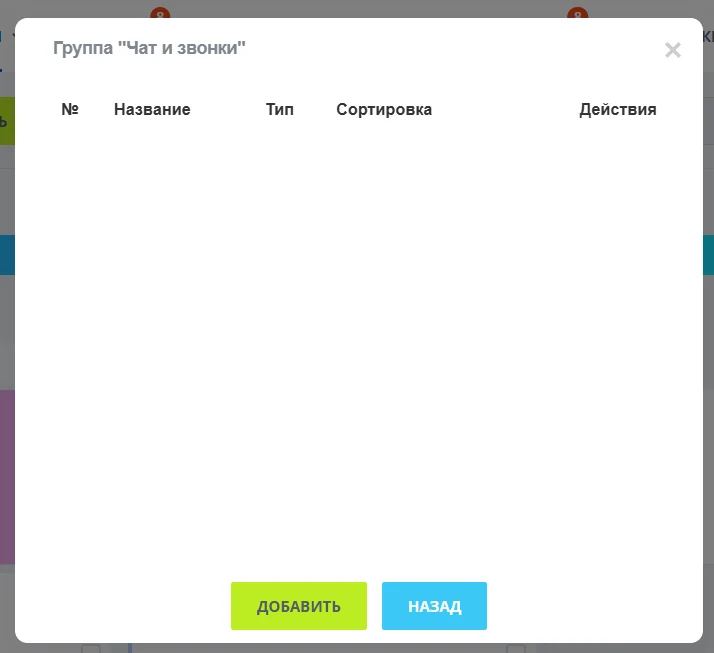
To create an auto-hint group, click its name. A dialog window with the group name will open, as shown in the figure.
Auto-hints: groups and display
To form a group of auto-hints, each individual hint must be created following the instructions for single hint creation. Once all elements of the group are created, they become available for viewing.
Auto-hints are displayed to users when they navigate to the corresponding website pages. The display occurs after a delay interval configured in the module settings. Elements are shown in numerical order.
Viewing a single auto-hint ends when the user clicks either the "I have read" or "X" (Close) button. Clicking the "X" button interrupts the viewing of not only the current hint but also all remaining hints created for that page. In this case, all hints for the page are marked as viewed and become unavailable upon the user's subsequent visits unless a new viewing session is manually initiated. Re-display is possible only if enabled in the module settings.
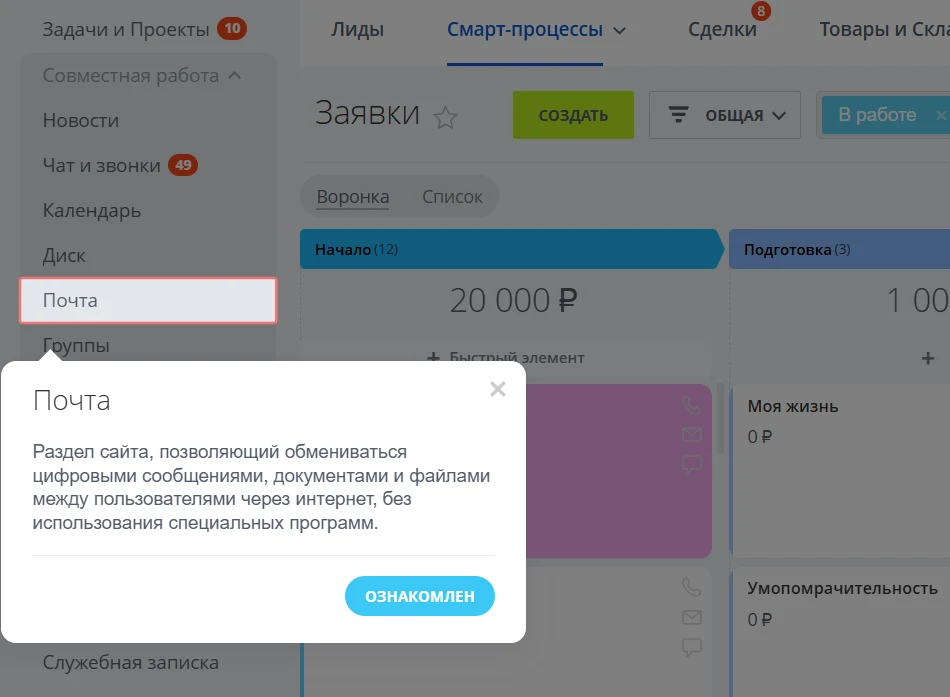
The figure below shows an example of a single auto-suggestion display.
Figure 8 shows an example of a single autohint display.
Step-by-step autohints include the following navigation buttons:
"Next" — displays the next autohint in the group;
"Back" — displays the previous autohint in the group;
"X" — closes the step-by-step autohint view.
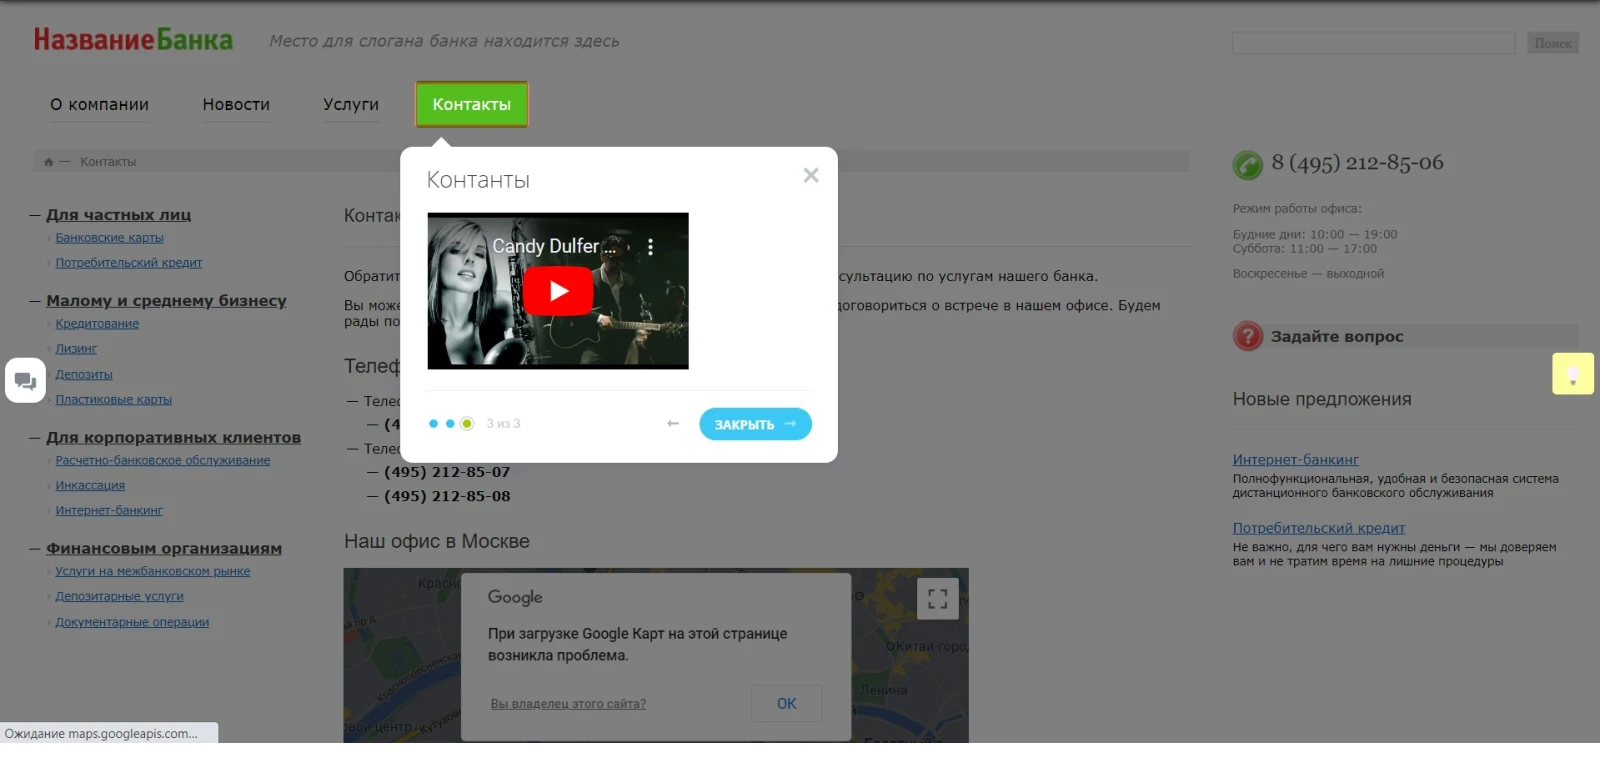
An example of the last autohint in a group autohint sequence is shown in the figure below.
On pages with active auto-suggestions, a button is displayed to re-show the suggestions. Figure 9 illustrates an example of the last auto-suggestion from a group.
If the 'Allow re-view' option is enabled in the module settings, the button allows the user to restart the autohint display in standard mode.
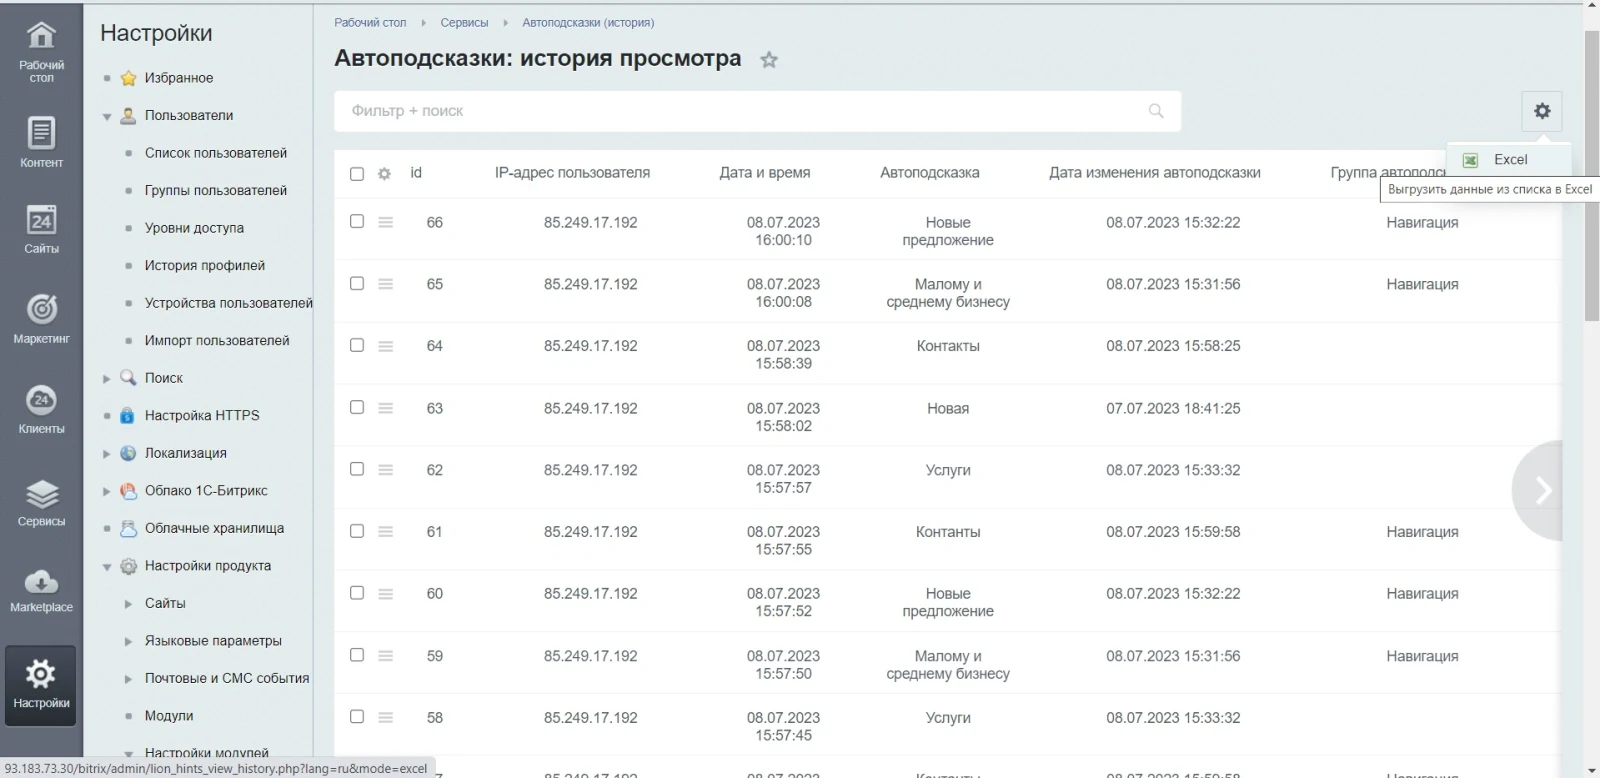
Autohint view logging
All autohint views are logged by default. Information about views is available to users with access to the portal's administrative section on the 'Autohints: View History' page located in the 'Services' section.
The 'View History' page displays data from 16 fields for statistics aggregation. This information can be exported to an Excel file using the standard '1C-Bitrix' platform functionality for generating files from table data on the page.
The built-in editor allows adding video, images, tables, and hyperlinks to hint descriptions, as well as formatting text.
Administrators can disable hint viewing for all users or turn off logging of views entirely. The view history log can be cleared of old records, and previously viewed hints can be reopened.
The 'Auto-hints' and 'Lightbulb' buttons are displayed on sites with 'Business' and 'Bitrix: Online Store' licenses in any convenient location on the page. Settings allow adjusting the delay timeout before showing a hint and defining colors for the buttons in 'off' and 'on' states.
The module can be deactivated. Upon module deletion, all settings, hint content, and their view history are preserved.
A user with the 'Auto-hints Editor' role can disable the display of one or more hints from the list on any website pages.
General iT can install and configure this module and check how it works on your website.
The module enables automatic sending of messages generated by a business process robot to Viber users. It serves as an alternative notification channel, allowing instant alerts about changes to leads, deals, and smart processes.
The module provides color highlighting for task cards across all available views: list, deadlines, my plan, calendar, and Gantt chart.
To enable this functionality, a color code must be specified in the task field. The input method depends on the field type selected in the module settings for storing color codes.
The module automatically adds users mentioned in comments to the observers of a smart process instance. This eliminates the need to manually invite these individuals to the task discussion. Mentioned users continue to appear in the card's comment feed.
The module displays current company reviews on the website from 17 external platforms: Yandex Maps, Yandex Business, Yandex Services, Yandex Reviews, Google Maps, 2GIS, VKontakte, Avito, ProDoctors, SberHealth, NaPopravku, Zoon, Otzovik, Flamp, Yell, IRecommend, and YCLIENTS. Visitors see fresh ratings directly on the service page or product card without navigating to third-party resources.
Stores selling on both marketplaces and their own websites often face a challenge: reviews accumulate over years only on the marketplaces. A visitor to the website sees an empty product card and leaves to check the item on the marketplace where reviews exist. This module solves the problem by transferring reviews to the website.
The displayed price covers the solution itself. Platform licensing, installation and customisation are checked separately. If the page offers bundles, select the required option before submitting a request.
How do I check compatibility?
Compare the supported editions and solution version in the technical details with your project. Before installing on a live website, we recommend making a backup and checking the solution in a test environment.
How much does this solution’s renewal cost?
The current renewal price is 19,500 ₽. Before you order, a manager will confirm the renewal period and whether it applies to your licence.
Can you help with implementation?
We can help install the module, check its settings and verify how it works in your project. Compatibility with other customisations and the scope of work are assessed before we begin.
Your cookie choices
Necessary cookies support sign-in, your cart and security. Optional analytics helps improve the website and starts only with your permission.
Our metrika.git.ru system: public pages, a random identifier, device and interaction events. Form contents, account and payment pages are excluded. Raw events: up to 90 days. Operator: General IT Rus LLC, INN 2310208877.
Your browser requests no tracking: analytics is off.